

Key Takeaways
- As always, your safety is a priority. Cut power or gas and don protective gear before any troubleshooting. Ventilate the area for gas units to reduce fume buildup.
- Begin with fundamental checks such as power, natural gas supply, water flow, and pilot light before progressing to more sophisticated diagnostics to promptly isolate common causes.
- Pair your debug steps to your heater sort, whether electric, fuel, tankless, or heat pump, and maintain a log of signs and steps for organized repair.
- With a multimeter, voltage tester, pipe wrench, and bucket, do the usual tests and flushing. Record each step and result for clarification.
- Think sediment, a bad dip tube or crossed plumbing when hot water is tepid or sporadic. Flush or swap.
- Reach out to a pro for gas leaks, large electrical faults, stubborn intermittent issues, or when it’s time for replacement and maintenance.
No hot water troubleshooting guide discusses common causes and quick fixes when a home has no hot water. It includes boiler, water heater, and plumbing checks, simple safety measures, and when to call in a professional.
It provides a checklist of easy tests, possible parts to check, and average repair costs in an easy to understand way. Its readers get a step-by-step guide to troubleshoot the problem or make a determination about immediately calling in an expert.
Safety Precautions
Before any servicing, cut power or gas to the water heater and get everyone and pets out of the house if you suspect a gas leak. Look out for wet floors, windows open to air out gas units, and a phone close by to dial 911 or a licensed technician.
Keep in mind, thermostats set at 120°F hit a sweet spot of safety, energy efficiency, and the risk of scalding and do not increase the temperature while you’re troubleshooting.
Electricity
Turn off the circuit breaker for electric water heaters and note the breaker position. With a non-contact voltage tester or multimeter, check that the wiring at the heater’s access terminals is not live before removing panels.
Don’t reach for those bare wires or terminal screws until you’ve confirmed that they’re de-energized. Insulated gloves provide additional protection. Tag wires with tape or tags as you unhook them so it all goes back together with the same wiring.
If the reset button keeps tripping after a proper reset, don’t keep resetting. Call a licensed tech because repeated trips can indicate a failing element, thermostat, or wiring defect. Safety first, of course! Always turn off power at the breaker before attempting any reset or electrical test.
Gas
Turn off the main gas supply valve prior to inspection on gas-fired heaters. If you smell gas anywhere around the unit, get out of the building immediately. Get everyone and pets out and call 911 or your gas company from a safe distance.
Don’t go back in until they say so. Do not light a lighter, pilot light, mobile phone, or any device that could spark near the heater. Test the room for proper ventilation. Closed up rooms can trap gas.
In the event of a pilot light relight, seek help from the manufacturer or a licensed technician, as it is hazardous to do it yourself. Annual professional servicing reduces gas-related risks.
Water Pressure
Shut off the main water valve to relieve pressure, then open a hot water faucet to help drain trapped water before loosening any plumbing connections. Let the heater cool. Hot tanks and lines can burn badly, so wait for the temperature to come down.
Drain with a hose or bucket, away from electricals and living spaces to prevent short circuits and water damage. Be on the lookout for unexpected squirts when loosening fittings. Residual pressure can catch you off guard.
Safety checks like the T&P (temperature and pressure) relief valve should lift slightly when tested and reseal without heavy leakage. Tank flushing, preferably every year, eliminates sediment that can obscure issues and diminish heating efficiency.
Initial Diagnosis
Initial diagnosis whittles the blame down to power, water flow, pilot ignition, or controller errors so you can make the appropriate next step. First, diagnose if it’s just one outlet being without hot water or the entire home. A lone cold tap is a localized plumbing defect and nowhere having hot water means the heater or the supply is faulty.
Observe any obvious leaks, rust, or standing water around the tank and test the temperature setting on the control. A set point that is too low can impersonate a failure.
Power Supply
Check the breaker box to see if a breaker has tripped or a fuse blown, as this is the easiest cause to rule out for electric units. Measure the outlet or hardwired leads to verify that 230 V (or local) is available and stable. If it has a manual reset, typically a red button near the upper thermostat, press it once power is restored, as a tripped thermal cutout can halt heating.
Check to see if the power light is on. If it isn’t and the breaker and voltage check out okay, you could have a problem with the internal wiring or control board, which may require a qualified electrician.
Water Flow
Verify the main water shutoff and the cold inlet valve to the heater are wide open so the tank can fill and dispense water. Check inlet piping for kinks, crushed sections or clogged strainers that restrict flow. Test multiple fixtures.
Low flow at all outlets often means supply restriction, while normal flow with cold water suggests heater-side problems. Consider the dip tube. If cold water is mixing with outgoing hot, users will see rapid cooling at taps. A failing dip tube commonly causes this symptom and requires part replacement.
Pilot Light
On gas models, is the pilot lit? If it’s not, your burners cannot fire and you will not have hot water. Follow the manufacturer’s relight procedure precisely. Often, a particular sequence and a steady match or piezo ignition are necessary.
Check the thermocouple for soot, bending, or corrosion. A bad thermocouple will close the gas valve. Observe the pilot flame. A steady blue flame indicates proper combustion. Yellow, flickering, or weak flames point to drafts, dirt in the burner assembly, or gas pressure issues.
Error Codes
Note any LED patterns or read any digital readout and jot down the exact code. Many modern heaters store such useful diagnostics. Check the manual or manufacturer site for code meanings.
Some codes recommend a simple reset while others signify component failure. Don’t hit reset unless the code protocol suggests it. Repeated resets instead of repair can defuse a hazard. If the error codes continue or indicate gas valves, heating elements, or control boards, schedule professional service.
Systematic Troubleshooting
A systematic troubleshooting method divides the issue into discrete steps, starting with easy verifications and progressing to complicated analysis. It minimizes guessing, assists in recording results, and indicates when to give up and call an expert.
Begin by enumerating symptoms, proceed with a water heater-type specific checklist, maintain safety consciousness, and document all tests and outcomes.
1. Identify Type
Identify if the system is electric, gas, tankless, or a heat pump. Locate the model and serial number on the equipment label for manuals or error-code lookups.
Note visible features: a storage tank and anode rod suggest a conventional tank; a burner and flue indicate gas; a small box with inlet and outlet piping often means tankless; outdoor-style coils and a compressor point to a heat pump.
Pair diagnostic steps to the type. Skip burner inspection on electric units and check breakers and elements instead.
2. Electric Systems
First, check the breaker panel and any dedicated fuses. A tripped breaker or blown fuse is common.
Take off the access panel, shut off power, and test heating elements and thermostats with a multimeter for continuity. Detect loose connections or burnt wires in the access compartment and tighten or replace spade connectors.
Test upper and lower thermostats for proper calibration and jump the upper thermostat to see if the lower element heats. This isolates which element is bad.
Swap out failed elements or thermostats and test again. Record part numbers and results for future reference.
3. Gas Systems
Make sure the gas is on, then check the pilot light or electronic igniter. Inspect the burner, main assembly, and pilot orifice for soot, dirt, or corrosion.
Clean with a brush or compressed air if possible. Systematic Troubleshooting tests the thermocouple and gas control valve operation. A weak thermocouple won’t keep the valve open.
Examine the venting and flue to confirm exhaust gases can escape. Blocked vents result in safety shutoffs and inadequate heating.
If ignition continues to fail after cleaning, replace defective parts and check for gas leaks with a soap solution or gas sniffing device.
4. Tankless Systems
Make sure minimum flow and pressure are achieved to activate the unit. Low-flow fixtures or clogged inlet screens frequently keep it from switching on.
Clean inlet filters and strainers, and check error codes or indicator lights. Reference the model guide to translate codes to faults.
Check gas manifold pressure or power supply on the unit. Varying supply results in intermittent heat. Keep a note of every code and test outcome.
If the problem continues, a pro can check gas regulation and heat exchanger condition.
5. Heat Pump Systems
Make sure the unit is in water heating mode and set to reasonable temperatures. Check air filters, coils, and fan blades for dirt or blockage that inhibit heat transfer.
Hear abnormal compressor or fan noises that signify mechanical wear. Bear watch for indications of refrigerant leaks or low charges, which deplete capacity.
Measuring pressures demands professional service. Preventive maintenance forestalls many of these breakdowns and maintains system effectiveness.
Advanced Problems
Advanced problems are either those that remain after basic checks or those that exhibit internal breakdowns. These usually require focused diagnostics, tooling, and even professional assistance at times.
Search for frequent outages, weird noises, discoloration of the water, leaks, or irregular temperature. Below are particular failure modes, symptoms, and step-by-step diagnostics you can attempt if you have hands-on experience or a trained technician on hand.
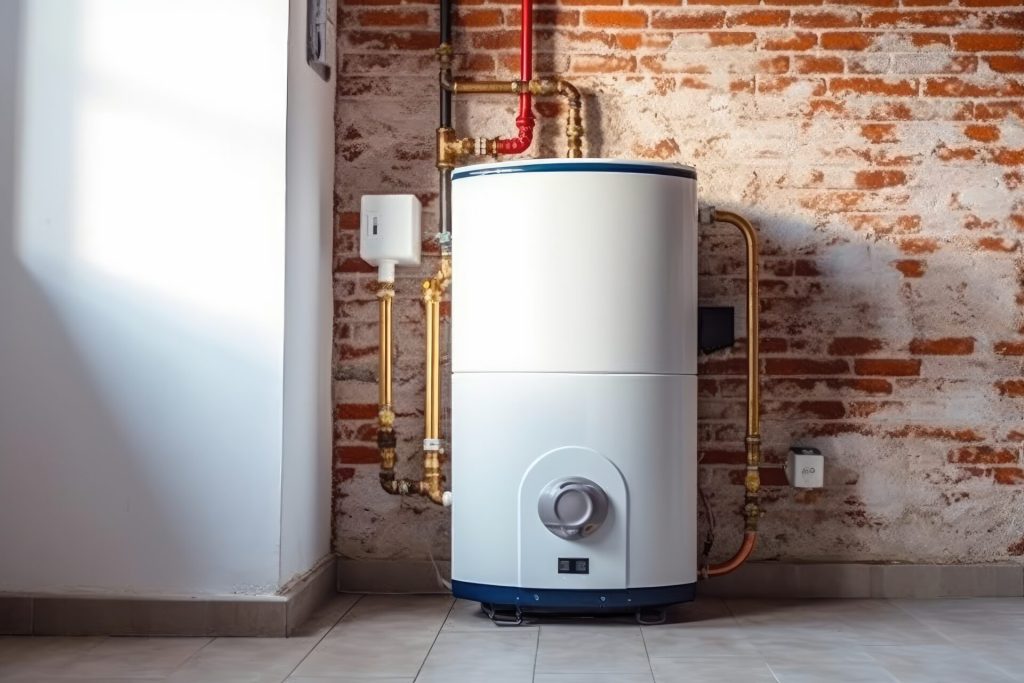
Sediment Buildup
Drain the tank to flush sediment from the bottom. Connect a hose to the drain valve and drain until clear. Sediment is an excellent insulator and can coat heating elements or burners, resulting in extended recovery times and less hot water.
You may hear popping or hissing as the unit heats. That’s pockets of trapped steam or sediment moving against the element or tank bottom. Heavy buildup can put on the brakes to accelerate corrosion and cause leakages around the tank or drainpipe shutoff valve.
Yearly flushing generally keeps this at bay, and if sediment is thick or stony, several drain-and-refill sessions or a professional descale might be required.
Faulty Dip Tube
Remove the cold inlet fitting and inspect the dip tube with a small camera or a long probe for cracks or disintegration. A broken dip tube brings cold water to the tank’s top, mixing with the hot water and resulting in accelerated hot water loss or tepid showers.
Swap out a broken dip tube for one that fits your tank depth and manufacturer requirements. The wrong length dip tube diminishes stratification and decreases usable hot volume.
Observe abrupt hot water behavior after repair as confirmation the dip tube was the culprit.
Crossed Connections
Test for reversed plumbing by running a hot and cold tap together and checking temperature at fixtures elsewhere. Warm water coming out of cold faucets or cold water coming out of hot faucets is a sign of crossed or shared lines, frequently the result of amateur work or complicated remodels.
Follow pipes from the heater to appliances and check for misrouted offshoots, mixing valves, or shared supply lines between units. Fixing misrouted pipes or putting in dedicated runs and check valves returns steady hot delivery.
Intermittent Issues
Observe outage patterns: time of day, peak usage, or after power events. Intermittent failures are typically electrical in nature. These can include failed heating elements, bad thermostats (some electric units have two), or a tripped reset button adjacent to the upper thermostat.
Short power outages can trip breakers or controls. Check breakers and reset switches. Gas units might exhibit irregular burner or pilot activity, necessitating burner inspection or thermocouple verification.
Log every occurrence noting date, time, and conditions to detect patterns. This documentation aids in identifying short circuits, thermostat cycling, or fuel supply issues.
In extreme or ambiguous situations, weigh repair against replacement, particularly with tank leaks, corroded elements, or recurring failures.
Essential Tools
Basic context: Before opening panels or touching valves, know the system type, switch off power, and plan the steps. Determine if the heater is electric, gas, tank, or tankless and find out its capacity and recovery period. For example, a 40-gallon gas tank might recover in 2 hours. That awareness establishes expectations and steers what tools are important.
Bring a multimeter, voltage tester, and insulated screwdriver for electrical testing. A multimeter will assist you in reading the voltage and continuity on thermostats and heating elements. It’s certainly handy but not always necessary for quick checks. A non-contact voltage tester can rapidly verify whether a circuit is live before you come in contact with it.
An insulated flathead screwdriver is used to open the thermostat panel on many water heaters and safely adjust or reset switches. ALWAYS shut off the circuit breaker or pull the fuses to the water heater first, and check with the tester that it is off. These steps minimize shock hazard and save you time by protecting you from mistaking an electrical problem for a mechanical one.
Grab a pipe wrench, adjustable pliers and a bucket for backup when doing plumbing work and repairing leaks. A pipe wrench couples large fittings on vintage steel tanks and supply lines. Adjustable pliers grasp the gamut of nuts and fittings on contemporary copper or flexible hoses.
During draining or loosening of fittings, always have a bucket underneath valves to collect water and protect your floors. When it comes to leaks, have ready replacement washers, plumber’s tape and an extra compression nut—little things that tend to fail and can be replaced then and there. Simple maintenance like flushing sediment from the tank extends life and minimizes clogs that feel just like heating breakdowns.
Always keep a flashlight and inspection mirror at the ready for seeing into those hard-to-reach places. Use a bright, hands-free light to scrutinize the pilot assembly on gas units, the sacrificial anode, pressure relief valve, and wiring connections inside access panels.
An inspection mirror allows you to see behind piping and around the burner or heating elements without having to remove more components than you need to. Proper illumination accelerates troubleshooting and avoids needless teardown.
Create a checklist of necessary tools prior to beginning any troubleshooting. Include safety gear (gloves, safety glasses), electrical tools (multimeter, voltage tester, insulated screwdriver), plumbing tools (pipe wrench, pliers, bucket), and maintenance supplies (plumber’s tape, replacement parts).
Note steps: cut power, verify power is off, check circuit breaker and fuses, inspect thermostat and elements, check pressure relief valve and for leaks, and test pilot or gas supply if applicable. A checklist keeps the work neat and helps you stay safe and efficient.
Professional Consultation
A professional consultation gets you past the basics to proper diagnosis and safe repair when no hot water continues. A professional plumber or water heater technician arrives equipped with the tools, experience, and code knowledge to locate root causes that are easy to miss, like concealed leaks, failed heating elements, or wiring faults.
They can test thermostats and element resistance, inspect gas valves and tank corrosion, and perform tasks that quick, DIY checks can’t easily or reliably accomplish. Reach out to a plumber or water heater specialist for difficult or lingering problems. If your home has sporadic hot water, noisy tank banging, or inconsistent water temperature, a technician will conduct diagnostic testing.
For electric units, they will isolate circuits, check element continuity with a multimeter, and test thermostats. For gas units, they will inspect the burner, pilot or ignition system, and flue. A homeowner who replaced one element after a single test may still have a failing thermostat. A professional will test both and replace only what is needed, saving time and cost.
Get expert help if you sense gas leaks, significant water damage, or persistent electrical issues. A gas smell, hissing at a joint, or corrosion showing on gas fittings need immediate shutoff and a professional gas-safe technician. Water stains, warped floors, or wet drywall close to the heater indicate leaks that can cause mold or structural damage.
An expert will identify the origin and recommend repairs. Frequent breaker trips or melted wiring require an electrician or a plumber collaborating with electrical experts to avoid fire hazards. Schedule trusted water heater installation or replacement if the unit is damaged beyond repair.
Professionals offer options such as high-efficiency gas models, heat-pump electric heaters, or modern tankless systems. They size units to household demand with flow rates and usage patterns, take care of permits, and handle venting and clearances. For example, replacing a small tank with a properly sized tankless unit can reduce energy use and provide continuous hot water for large households.
Have them come by for maintenance visits regularly for peace of mind down the road. Yearly inspections cover tank flushing to remove sediment, anode rod inspection, pressure relief valve testing, and thermostat calibration. Routine maintenance will help detect the earliest signs of failure, avoid expensive tank replacement, and save service life.
How to choose a consultant: check credentials, look at reviews, ask for references, and request a written estimate and service plan.
Conclusion
You now have a roadmap to discover why a water heater isn’t delivering hot water. The guide includes basic checks, such as power, pilot light, and valve positions. It demonstrates how to detect leaks, strange sounds, and sediment indications. It outlines steps for more intricate malfunctions such as broken heating elements, a malfunctioning thermostat, or a clogged dip tube. Use the proper tools and take some basic safety precautions. Record your findings and tests. That record assists should a pro get involved. For emergency leaks, gas smells, or if you just don’t feel confident, turn off the system and call a licensed technician. Want a checklist or a quick troubleshooting sheet? If you want it, I’ll build one.
Frequently Asked Questions
Why is my water heater not producing hot water at all?
Test the power or fuel source first. For electric units, check the breaker and thermostat. For gas, check that the pilot light or ignition functions and that the valve is open. If the basic checks out, something like a heating element or burner may need replacement.
Why is my hot water lukewarm or not as hot as before?
Lukewarm water usually indicates a bad thermostat, sediment build-up, or a bad heating element or burner. Flush the tank and test the thermostats. If problems continue, call in a professional technician to test the components and safety controls.
Why does hot water run out quickly?
Small tank, high household demand or a failed dip tube can deplete very quickly. Consider a bigger tank, go tankless, or install low-flow fixtures. A plumber will check the dip tube and suggest the most suitable upgrade for you.
Why is my water heater making noise?
Popping or rumbling typically arises from sediment layering in the tank. Flushing the tank can quiet noise. Hissing can indicate a leak or pressure problem. Shut off the unit and call in a technician to check it out.
Why is my pilot light repeatedly going out (gas heater)?
A grubby pilot or thermocouple or gas supply issue is what usually causes this. Clean the pilot assembly and test the thermocouple. If the problem persists, reach out to a licensed gas technician for a safety-focused diagnosis.
What should I check first when there is no hot water only at one faucet?
Check the faucet’s mixing valve or anti-scald device first. It may be installed wrong or broken. Check adjacent sinks to eliminate a single leak or localized problem before looking to the water heater.
When should I call a professional for no hot water?
Speak to a pro if you smell gas, see leaks, find corrosion, or simple resets and checks don’t bring back hot water. Call for pilot or ignition problems if you’re uneasy working with electrical or gas lines.