

Key Takeaways
- Average duct sealing costs differ by project size and method, with manual sealing costing less and Aeroseal costing more initially while often providing more efficiency and energy savings over time.
- Bigger houses, several HVAC zones, and more registers add to materials and labor requirements. Anticipate greater expenses for larger or more sophisticated systems.
- Bad duct access and major leaks increase labor and repair costs since concealed ducts or significant damage need more time, specialized equipment, or partial replacement.
- Local labor rates and contractor know-how influence overall cost. Ask for detailed, itemized quotes and compare several that list inspection, leakage testing, sealing technique, and repairs.
- Think of rebates from utilities and programs to mitigate upfront cost. Balance DIY savings against decreased efficacy, voided warranties, and potential hidden lifetime costs.
- More than just the sticker price, sealed ducts enhance comfort, indoor air quality, HVAC longevity and can reduce heating and cooling bills by as much as 30 percent, making the service a smart long-term investment.
How much does duct sealing cost is the common question homeowners want to know when evaluating energy upgrades. Typically, costs average between 150 and 1,000 USD based on duct size, access, and repair requirements.
Labor, materials, and leakage testing all drive price differentials. Smaller fixes often run under $300 while full-system resealing can top out on the higher end.
The article describes cost drivers, savings projections, and when to hire a pro.
The Price Range
Duct sealing prices vary widely. Here’s a quick list outlining typical ranges and what they mean:
- Typical overall range: $1,000 to $5,000. This includes tiny work orders all the way to whole-system fixes in mansions or elaborate systems.
- Common average: $1,500 to $2,000 for an average-sized single-family home. A lot of markets see averages around $1,500 to $4,000 based on local rates and job scope.
- Aeroseal specific: $1,300 to $3,000 for most single-family homes. Aeroseal is at the higher end of the spectrum because it employs specialized equipment and often addresses hidden leaks.
- Per-area pricing is roughly $1 to $1.50 per square foot as a general rule. This can help quickly estimate the cost for homes where duct area is known.
- Classic manual sealing costs between $1,000 and $1,500 for a typical home when contractors use mastic, foil tape, and spot repairs. In the past, that was around 20 to 30 percent of the price of a full HVAC system.
- High-end and complex jobs cost up to $5,000 or more when multiple systems, long duct runs, several zones, or partial replacement are involved.
- Rebates and offsets: Utility rebates or programs, for example, regional incentives like Rocky Mountain Power offerings, can reduce the upfront price by hundreds to over a thousand.
1. Home Size
Big homes take more time, more materials, and frequently more than one technician, so price goes up with size. Your small 80 to 120 square metre home will sit near the low end of the average, while large homes over 300 square metres, multi-level or two HVAC homes skate toward higher bands.
More than one zone or two air handlers means more connections, dampers, and registers to test and seal. Anticipate extra labor and materials. The quantity of vents and registers is also important. Each one is a potential leakage point and increases inspection and sealing time.
A simple cost table can clarify: small home costs $1,000 to $1,500, medium costs $1,500 to $2,500, large costs $2,500 to $5,000.
2. Ductwork Accessibility
Ducts hidden in walls or cramped soffits are more expensive to access. Extra labor and occasional opening cuts add to the cost. Ducts exposed in open attics or basements cost less to service because they’re fast to inspect and seal.
Inaccessible systems might necessitate scaffolding, overtime, or special equipment, all of which increase the invoice. Budget for the possibility of repairs, such as patching access holes in ceilings or walls.
3. Leak Severity
Small holes are cheap to repair and frequently fall in the bottom of projections. Extensive leaks or old gutted ducts need more mastic, extended pressure testing, and sometimes even a partial replacement, so the price goes up.
A professional duct leakage test gives you precise extent and cost. Serious degradation can nudge a project from sealing all the way into replacement range.
4. Sealing Method
Manual sealing (mastic, tape) is cheaper in capital terms and functions well where leaks are evident. Aeroseal, while more expensive, seals hidden leaks and generally boosts efficiency more.
Aeroseal tends to run in the $1,300 to $3,000 range. Manual jobs are frequently less than $1,500. Pros and cons: manual is cheaper and simple. Aeroseal is more thorough but costs more.
5. Labor Rates
Final cost depends on local labor rates and permit fees, with metro areas with higher wages trending toward the top of the ranges. Seasoned contractors cost more but may cut down on rework.
Complicated projects add time and expertise, so request detailed quotes that display labor separation.
Professional vs. DIY
Professional duct sealing guarantees comprehensiveness, quantifiable air-flow optimization, and a professional warranty to shield homeowners. Technicians utilize diagnostic tools to plot leak points and gauge system performance prior to service. They typically use aerosol duct-sealing technology that sends a sealant into the duct system and seals leaks from within, behind concealed walls or under floors.
This approach generally generates a more thorough seal than surface-only repairs and can deliver energy savings of 10 to 20 percent compared to pre-seal conditions. A professional records the work, notes any structural or component problems, and offers a warranty that protects you for years into the future, covering workmanship and materials, giving you peace of mind.
DIY duct sealing with mastic, foil tape, or regular duct tape is less expensive initially but usually less effective and temporary. Materials for a DIY job can run approximately 500 to 1,500 in the same currency, depending on sealants, tapes, and tools purchased. A homeowner can seal obvious joints, register boots, and accessible seams, which can cut some losses and make comfort better in localized areas.
For minor, accessible leaks, this can be a handy choice when time and budget are limited. However, improper DIY sealing can cause new problems. Surface-applied tape will peel and mastic will crack if not mixed or applied correctly. Sneaky leaks persist because your eyes overlook cracks within walls or behind insulation.
That imperfect sealing can cause inefficient system operation, uncomfortable heating or cooling, and more energy consumption than predicted. Homeowners should be aware that some manufacturer warranties or HVAC service agreements can be voided by do-it-yourself work on ducts or associated equipment, so a DIY effort could remove warranty safeguards.
Homeowners need to balance the immediate savings of DIY with the probable long-term advantages of going pro. Consider system complexity, access, and the size of the problem: simple, minor leaks in easily accessed ducts can justify a DIY repair. Complex networks, extensive damage, or recurring issues merit professional evaluation.
Professionals provide a more precise diagnosis and can recommend whether sealing, repair, or full duct replacement is most appropriate. The latter can yield up to 20 to 30 percent energy savings in some cases. Factor in time too: a thorough DIY job can take several hours and still miss leaks, while professionals complete the job faster and with tools designed for comprehensive results.
Material Breakdown
Duct sealing begins with material know-how. Knowing what’s on the market and how each material impacts price, longevity, and results is essential. The materials range from basic tapes and mastics to highly specialized aerosols. Options vary based on duct state, accessibility, and if you’re addressing sealing minor leaks or prepping for replacement.
- Common materials used in duct sealing:
- Aluminum foil tape (UL 181-rated)
- Butyl tape and high-heat foil tape
- Mastic (water- or solvent-based)
- Silicone sealer for joints and small cracks
- Metal-backed duct wrap and insulation sleeves
- Sheet metal screws and gasketing for fittings
- Aerosol sealant (such as the proprietary particles used by systems like Aeroseal)
- Grommets and collars for registers and transitions
Cost contribution by material type varies significantly.
- Tape and sealants: low unit cost with high labor when many seams exist. Expect 5 to 15 percent of a manual sealing estimate. Example: foil tape at a few dollars per meter versus mastic tubs at tens of dollars.
- Mastic and silicone have moderate material costs and higher longevity. They typically account for 10 to 25 percent of manual sealing costs. Mastic can last for decades and is frequently rated for over 40 years.
- Mechanical fasteners and gasketing are small line items but necessary for durable repairs. They account for 5 to 10 percent of the price.
- Insulation and wrap: material cost can be moderate and provides sealing and thermal advantages. It accounts for 10 to 20 percent of project cost based on coverage.
- Aerosol systems (Aeroseal) have a higher material and equipment cost that can account for 30 to 50 percent of the project’s total price for the sealing step, though they reduce labor time and can seal hard-to-reach leaks.
Aeroseal employs special aerosol particles that enter leaks from within the system and adhere at leak edges. The proprietary particles and rented equipment make Aeroseal pricier in material terms than manual tapes and mastics. It can save on labor and access work.
For small leaks, aerosol sealing can save about $1,000 versus invasive manual sealing that requires duct access or partial replacement. A clear comparison helps with decision making. Manual sealing materials are cheaper per unit and can be done incrementally, but they require more access and labor.
Aerosol sealing costs more initially but frequently seals leaks the manual way cannot reach and can extend the duct life by 5 to 10 years. Ductwork over 15 to 20 years old exhibits more material breakdown. In such cases, material determines if to seal or replace. Replacement costs usually run from 2,000 to 6,000 or more, so sealing is a no-brainer.
Material longevity and risk factors are also important considerations. Some sealing materials offer durability beyond 40 years, prolonging duct life that otherwise might last 20 to 25 years. Sealing diminishes the possibility of pulling contaminants from crawl spaces, attics, and wall cavities into the system.
Beyond The Price Tag
Duct sealing is more than just a line item on a home-improvement bill. It pays dividends in comfort, system efficiency, indoor air quality, and lifetime costs. Here are the fundamentals where sealing pays, with specific examples and numbers to help balance value beyond the price tag.
Energy Savings
Sealed ducts can reduce heating and cooling costs by up to 30% in the typical home. They demonstrate HVAC energy efficiency bumps of approximately 20% post sealing work, depending on the starting condition. If a household spends $1,200 a year on HVAC, a 20% reduction is $240 saved every year and a 30% reduction is $360 saved.
Over three years, those savings accumulate to 720 to 1,080 units, consistent with typical estimates that the payback period is around 2 to 3 years. Leaks can frequently add up to a few hundred CFM in old systems, creating a constant drain. Sealing minimizes wasted air, so your system runs less often and achieves set temperatures with less effort.
That brings down the monthly bills and carbon footprint. For a hands-on perspective, a mini-chart or basic table tracking pre- and post-seal energy consumption by month provides homeowners with tangible evidence of the accruing savings.
System Longevity
Sealed ducts reduce HVAC equipment strain. Leaky ducts cause blowers to run longer and compressors to cycle more, which wears them out faster. By minimizing leaks, you keep airflow balanced and components operating close to design conditions, which reduces overheating and sudden failures.
Less wear translates to reduced service calls and maintenance costs. With regular inspection and sealing in a timely manner, systems can reach or even surpass the industry standard minimum service life of approximately 10 years. By delaying replacement even by a few years, you avoid a major capital expense and keep operating costs lower over the unit’s full life.
Air Quality
Sealing prevents dust, pollen, and pollutants from being drawn into the duct network and re-circulated through your living spaces. That’s crucial for households with allergies, asthma, or other respiratory issues. With less particle entry, filters have lower loads and vents stay cleaner.
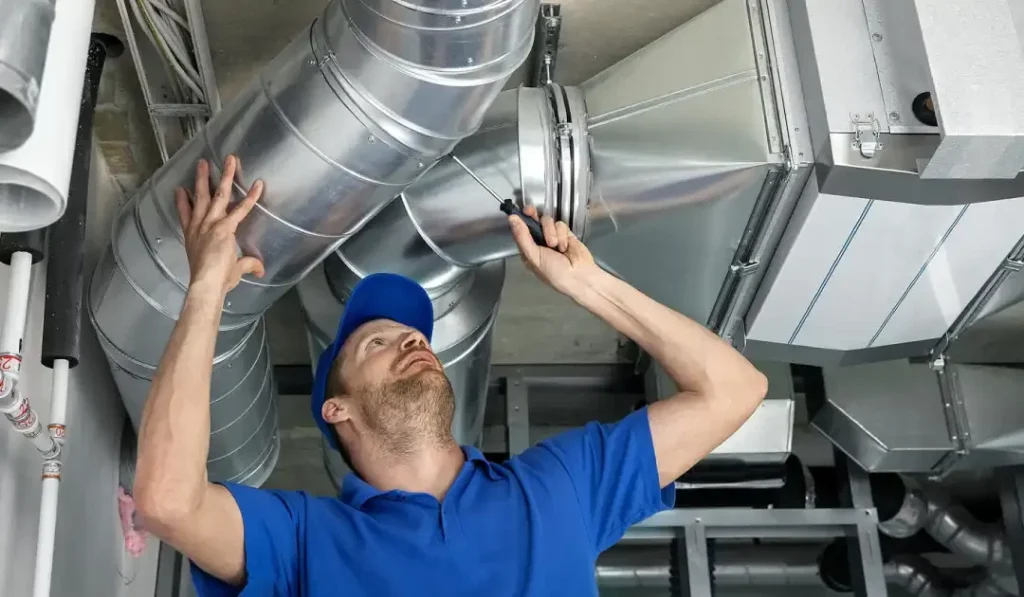
Sealed ducts better manage humidity and moisture migration in the system, reducing the potential for mold growth and water damage. Better air quality and a healthier home and rooms that just feel better all year round.
Other homeowners mention visible decreases in dust and a feeling of steadier temperatures post-sealing, as well as reduced utility bills.
Evaluating Quotes
Start by contrasting a minimum of three quotes to witness true variation in scope, approach, and cost. An uncomplicated page-by-page comparison makes it easy to identify holes. Pay attention to whether each quote states a simple visual check or a complete leak test.
Visual inspections run around 115 and provide minimal information. Full exams for bigger houses can go as high as 600. A duct pressure test is often listed separately and runs about 200 to 450, about 300 on average. If one company charges 75 to 150 for a “test,” see what that really measures; some cheap tests contribute minimal useful information.
Go over the scope of work line by line. Request that the quote specify duct inspection, what type of leakage test and how it’s sealed — aerosol mastic, foil tape, or manual mastic and mesh. Check to find out if little fixes, such as taping small leaks or swapping out a few feet of duct, are part of the price or extra.
Make sure your price includes post-seal testing to confirm results. Inquire if the contractor will conduct pre- and post-seal pressure tests. A post-test can demonstrate how much leakage was corrected and substantiate warranty claims.
Check out contractor credentials and track record. Ask about experience with similar buildings and for references or recent project photos. Read customer reviews on third-party sites, not just the company page.
Check licenses, insurance, and any manufacturer or program certifications that correspond to rebates. Rebates may alter the net cost, so inquire about eligibility and whether the contractor will take care of the forms. Reliability matters: some providers reply slowly, and collecting three detailed quotes can take a couple of days or more.
Materials and labor. Quotes typically indicate material costs of around 10% and labor around 90%. This is why labor practices and crew skill are so important. A low labor rate could lead to hurried work and overlooked leaks.
Consider lifetime value: paying 350 for a thorough test that uncovers 3,000 in needed repairs may avoid wasted heating and cooling costs later.
Make a checklist or basic spreadsheet to compare features and prices. Add columns for inspection type, pressure test cost, sealing method, what repairs are included, warranty and timeline, what rebates they handle, material and labor split, and references.
Use that to prioritize bids instead of deciding all on lowest price. Anticipate some fluctuation and doubt ambiguous listings. A pretty explicit quote is a warning of pro work.
The Hidden Costs
Duct sealing appears to be simple. Multiple hidden costs determine the ultimate invoice and lasting benefit. Costs vary widely. Typical projects run from 500 to 4,000 currency units, with most homeowners paying between 1,500 and 2,500. Price per square metre, shown here in per square foot for industry standards, typically ranges between 0.50 and 1.50. Those figures don’t factor in follow-on work, testing, or repairs that frequently arise once a contractor opens the system.
Surprise fixes can significantly impact the overall cost. When seals are inspected, the duct sections are frequently damaged or deteriorated. Ductwork replacement or repair pushes the total up fast, as one damaged trunk or elbow can add several hundred to a few thousand onto the invoice based on access and material.
Pressure testing and professional inspection together generally add 150 to 450 to the job, and these tests will identify leaks requiring repair. A small home with a hidden tear near an attic register might need a 300 repair plus sealant, moving a 1,200 project closer to 1,800.
Related home work can also contribute to the costs. Caulking can reveal requirements for additional insulation or light construction to maintain thermal and airflow efficiency. Whether it’s adding insulation in an attic or around a trunk line, this can cost anywhere from a few hundred dollars to over a thousand dollars, depending on depth and area.
Sealing works so well in improving airflow that ducts or registers have to be adjusted, or drywall openings repaired after access, each of which adds both cost and time.
Underlying system problems are another consideration. Duct sealing targets leakage, not general HVAC issues. Bad airflow from undersized duct runs or a failing blower motor or a mismatched system is still on the table. If sealing exposes those issues, anticipate more HVAC repair or replacement costs. Improved duct integrity can increase static pressure, showing a weak fan that needs replacement for proper performance.
Runaway expenses can occur if regular maintenance is neglected. Advantages of sealing can last, but regular inspections maintain them. Pressure test or visual inspection every few years, budget for occasional touch-up sealing and duct cleaning, a few hundred. Energy savings over time, typically 5 to 30 percent, can help make up for the upfront expense, only if upkeep is maintained and associated HVAC problems are addressed.
About the materials and safety, the sealant we typically use is a non-toxic vinyl acetate polymer, and the odor dissipates in less than two hours, so it’s great for homes that are still occupied. Consider airing out work and light clean-up.
Conclusion
Duct sealing costs depend on your home’s size, how much duct leakage there is, and the sealing method. Small jobs may dip into the low hundreds of euros. Full-system work can hit the low thousands of euros. Pro crews bill for inspection, materials, and labor. DIY kits save money but require attention and effort.
Decide based on explicit objectives. Looking for consistent warmth, reduced bills, or fewer drafts? Choose professional work. Looking for a cheap solution and know your way around basic tools? Test out a kit on a simple section first. Itemized quotes, references, blower test, or pressure reading results.
Make the math simple: compare expected energy savings against the up-front price. If such savings cover half the cost in two years, the job pays off. Obtain one more quote and set up the work.
Frequently Asked Questions
How much does professional duct sealing typically cost?
Professional duct sealing typically runs between approximately 200 and 1,200 EUR, depending on the size of the home and the complexity of the duct system. Anticipate higher costs for large homes, multi-zone systems or challenging access.
Can I seal ducts myself to save money?
Yes. DIY kits are about 20 to 200 EUR. You save on labor but require time, the right materials, and access to skills. Errors can lower efficiency or mask leaks.
What factors most affect the total cost?
Duct system size, access difficulty, materials, labor, labor rates, and whether you need repairs or insulation are the key cost drivers.
Does duct sealing reduce my energy bills?
Yes. Proper duct sealing can reduce heating and cooling losses, frequently reducing energy bills by 10 to 30 percent, depending on the severity of leaks and local climate.
How long does professional duct sealing take?
Most single-family jobs complete in 2 to 6 hours. Bigger or elaborate systems could require an entire day. Technicians will test prior and subsequent to assure results.
Are there any long-term benefits besides energy savings?
Yes. Advantages include enhanced indoor air quality, more even temperature distribution, less HVAC strain, and possible extended system longevity.
Will insurance or rebates cover duct sealing costs?
Energy-efficiency rebates or your local utility may even assist. Insurance generally does not pay for routine sealing unless associated with an insured HVAC malfunction. Compare to local programs and utility incentives.