

Key Takeaways
- Duct leaks can be caused by aging materials, incorrect installation, physical damage, pressure differences, and environmental conditions. All of these factors affect the system’s performance and efficiency.
- If left unchecked, leaks cause energy waste, temperature imbalances and reduced air quality, which can lead to higher utility bills and health issues.
- Routine inspections with visual inspections, smoke tests, and airflow detection assist you in identifying problem areas and prioritizing repairs.
- Basic DIY sealing is fine for small leaks. Expert help is better for complex or large-scale ductwork.
- Choosing between repair and replacement is a decision influenced by the severity of damage, system age, and cost efficiency in the long run.
- Such as dust, pest control, and maintenance to ensure that ducts don’t leak and the whole system stays efficient.
Duct leaks occur when air escapes through openings or holes in a structure’s ducting. These leaks can waste energy, increase your bills, and make rooms uncomfortable. Dust, allergens, and outside air can be pulled in through these openings, which impacts indoor air quality.
Tiny leaks are prevalent in ancient and brand new buildings alike. To help detect, repair, and avoid duct leaks, this guide outlines straightforward measures and indicators to look out for.
The Root Causes
Air leaks in ducts have numerous origins. Most can be traced back to the way air ducts are constructed, installed, and maintained. Tiny cracks, holes, or disjointed sections could be losing 20 to 30 percent of your conditioned air in many homes. This leads to higher energy costs and reduced comfort, even if energy rates do not increase.
Below is a table comparing root causes, impacts, and practical solutions.
| Root Cause | Main Impact | Solution |
|---|---|---|
| Age | Weakened materials, higher leaks | Replace old ducts, use modern materials |
| Poor Installation | Air loss from bad joints | Skilled installation, seal ductwork |
| Physical Damage | Holes/cracks, air escapes | Repair or patch damaged sections |
| Pressure Imbalances | Forced leaks, uneven airflows | Balance system, check airflow |
| Environmental | Wear from weather/pests, more leaks | Insulate, protect, regular inspections |
1. Age
Older duct systems leak more as materials break down. Metal, flexible plastic, or fiberglass ducts all weaken with age. If the surface is compromised, rust or corrosion may build up, particularly in humid areas.
Duct materials have quite a range of life spans. A few hold up for decades if you take care of them, while others collapse in under 15 years if you don’t. Obsolete duct designs bleed excess energy, as antiquated layouts tend to have more joints and longer runs, which translates into more places for leaks.
Symptoms such as staining, chipping, or holes indicate aging ductwork that requires repair.
2. Poor Installation
Poor installation is a primary cause of duct leaks. If joints aren’t sealed well, air sneaks out at every juncture. In a few homes, installers employ non-duct-rated tape or mastic, which peels after a few years.
Air ducts can become disconnected if they’re not secured properly. Occasionally, ducts are sized incorrectly for the space, which stresses seams and joints. This frequently occurs when shortcuts are taken or when unskilled workers do the work.
Master HVAC technicians use the proper supplies and equipment, ensuring every joint tightly fits and seals.
3. Physical Damage
They’re everywhere – holes and cracks, especially on ducts that crawl through crawl spaces or unfinished spaces. Rodents and other pests can chew through duct walls. Home renovations can sometimes leave ducts dented or punctured, which causes air leaks.
Temperature swings can cause duct materials to expand and contract, resulting in fractures over time. Loose fittings or connectors allow air leakage and diminish system performance.
4. Pressure Imbalances
Pressures within your duct system can force air through these cracks or weak areas. Return ducts under negative pressure pull in unfiltered air from attics or basements, making leaks more damaging.
Blocked vents contribute to pressure issues and can generate new leaks over time. Observing airflow patterns identifies where these disequilibriums occur.
Pressure problems not only lead to wasted energy but they reduce system performance and comfort.
5. Environmental Factors
Weather plays a huge role in duct systems. Hot summers and cold winters warp and split the materials, leaving new leaks. Elevated humidity accelerates rust and corrosion in metal ducts. Flexible ducts can sag and tear.
Ducts in attics, basements or crawl spaces are subject to greater strain. Tree roots or shifting soil can press on underground ducts, cracking or breaking them.
Periodic inspections, insulation and physical barriers protect against these dangers.
The Hidden Costs
Duct leaks have a hidden cost. These leaks can literally drain money, comfort, and air quality from homes across the globe. As the financial and health effects accumulate over time, duct maintenance becomes an essential priority for anyone with a central HVAC system.
| Cost Type | Leaky Ducts (10 Years) | Sealed Ducts (10 Years) |
|---|---|---|
| Wasted Energy | $5,000–$10,000 | $0–$1,000 |
| Extra HVAC Repairs | $1,500+ | $300 |
| Early Equipment Replacement | $3,000–$8,000 | $0–$2,000 |
| Basic Maintenance | $200 | $400 |
| Total Estimated Spend | $9,700–$19,700 | $700–$3,700 |
Energy Waste
As much as 30% of air moved by an HVAC system leaks through leaky air ducts. This makes heating and cooling units run longer, pushing energy bills higher. Homeowners could be paying an additional $200 to $600 a year in wasted energy alone.
This number accumulates rapidly and exceeds $5,000 in a decade and $10,000 over a system’s lifetime. In humid or hot climates, they fail earlier due to extra pressure from leaky ducts. If air leaks before it ever gets to its designated room, the system has to run even longer to reach temperature.
This not only spikes monthly costs but also prematurely wears out components, resulting in more frequent and costlier repairs. A straightforward solution, like duct sealing, tends to minimize energy waste. It reduces costs and increases the system efficiency and longevity of the HVAC.
Comfort Loss
Duct leaks make some rooms warmer or cooler than others. Big leaks can cause rooms on different sides of a house to have a temperature difference of several degrees Celsius. They cause unwelcome drafts or hot and cold spots, particularly in weather extremes.
Occupants could continue turning the thermostat down to repair these imbalances. This simply leads to more energy consumption. Well-sealed ducts keep temperatures steady, making every room more comfortable. With no leaks, the system can maintain a balanced climate throughout all areas.
Air Quality
When ducts leak, dust, pollen, and other particles are sucked into the airflow. This can raise the amount of allergens and musty smells indoors, particularly in humid areas. Badly sealed ducts bring in excess moisture, which promotes mold.
These leaks can cause health issues, like respiratory issues or allergies, especially in young children and the elderly. Sealing duct blocks external air and keeps room air cleaner. Good upkeep can avoid hidden harm to the home’s framework from moisture and mold, saving repair expenses.
Your Detection Guide
Duct leaks are a common problem in new and old homes alike. They may result in increased energy consumption, temperature imbalances and unhealthy air quality. Even a thoughtfully controlled thermostat won’t protect you from sky-high utility bills if you’re leaking air through holes or shoddy duct joints.
Research indicates that most homes lose 20 to 30 percent of their conditioned air this way. Checking for leaks isn’t just a money saver; it can extend the life and efficiency of your heating and cooling systems. Below are key methods you can use to find duct leaks:
- Examine all exposed ductwork for obvious cracks, holes or loose joints.
- Spray with smoke, such as incense sticks or smoke pencils, to observe the airflow.
- Check for drafts around seams and joints with a hand during operation.
- Open a door or window 2 to 3 centimeters and turn on the blower to amplify wind.
- Get your other household members involved in checking vents in various rooms.
- Document each discovery by room or duct section to target your repairs.
- Know: Your Detection Guide If you haven’t checked your ducts in five years, book a professional inspection.
- Be sure flexible ducts are strapped every 1.2 meters to prevent sagging.
Visual Inspection
Begin with an exhaustive inspection of accessible ductwork. Use a flashlight to assist in identifying problems in shadowed nooks and crannies. Look for tears, gaps, or metal parts tearing away.
Dust streaks at seams and around joints frequently indicate where air is leaking. Sometimes sections will be disconnected or just not fit tightly. Flexible ducts cannot sag; they should be strapped up every 1.2 meters.
If you observe tape that’s peeling off or dried caulk, flag that location for repair. Sketch or photograph each trouble spot, so nothing gets overlooked when you repair it.
The Smoke Test
A smoke test helps you visualize leaks that you could otherwise miss with your eyes. Light an incense stick or a smoke pencil and hold it to seams and joints with the fan operating. If smoke gets sucked or blown out of a gap, that’s a leak.
Observe the path of smoke. If it floats sideways or pulls in quickly, a large leak is probable. Make notes of where smoke leaks or redirects. This test is brilliant for a bigger home or ducts buried behind walls because smoke can reveal leaks fast, even in hard-to-access places.
Feeling for Airflow
With the system on, pass your hand near duct seams, joints, and vents. If you sense a draft or difference in temperature, air is slipping out. Look for cold or warm patches on walls or floors where ducts go through.
This can indicate leaks within the structure. Pair this with the ‘smoke test’ for those tricky spots. Have a family member check rooms simultaneously. This can help locate leaks more quickly.
This tactile approach is straightforward, fast, and serves as a good initial test before diving into repairs.
Sealing Solutions
Duct leaks suck energy, deteriorate air quality and inflate heating and cooling expenses. Sealing them can increase efficiency, reduce bills and make a healthier indoor environment. Duct sealing solutions range from simple DIY patches to sophisticated professional interventions. The best option depends on leak size, access to ducts and budget.
Common Sealing Methods:
- Apply HVAC duct sealing tape for minor to moderate leaks. This tape is durable and adheres well if used on clean surfaces, remaining flexible for years because of new polymers.
- Use mastic, a thick paste that fills in gaps and cracks. It does not flake with time and adheres to metal and flexible ductwork alike.
- Use aerosol sealants sprayed inside ducts to locate and plug leaks, particularly in difficult areas.
- Insulation wraps reduce heat loss and aid the sealed joints.
- For severe or extensive leaks, employing a professional with professional-grade tools can ensure a thorough job.
DIY Methods
Faced with these small leaks, a number of homeowners opt to seal ducts on their own. HVAC duct sealing tape is a start. Wrap it snugly around clean, dry joints. It sticks great and is convenient for little projects.
Mastic sealant works too. Brush or use a gloved hand to apply it. It dries to a flexible finish and lasts for years.
Aerosol sealants come in handy when ducts are concealed behind walls, beneath floors, or ensconced in ceilings. These products emit a fog within the system. It mists where air leaks, sealing leaks without tearing down walls.
Certain aerosol formulations are faintly aromatic, and this scent dissipates rapidly, generally within a couple hours. Insulation wraps, although not a sealant, do assist in preventing some temperature loss by minimizing losses through existing ducts and keeping the sealed areas tight.
Always follow safety rules: wear gloves, a mask, and eye protection. Don’t seal by an open flame or hot surface.
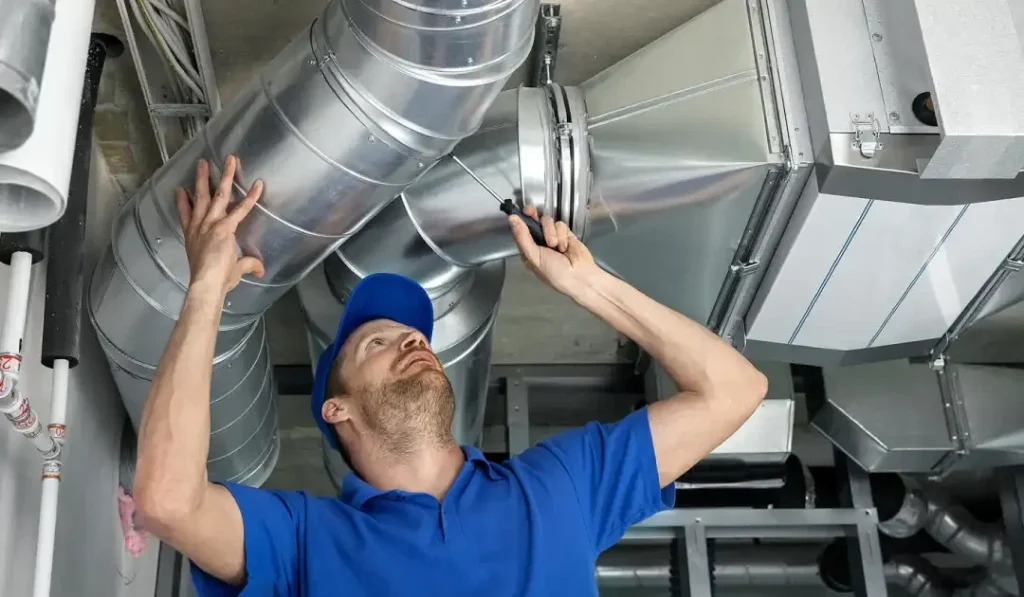
Professional Sealing
Hiring a pro is best for big or elusive leaks, like those in metal trunk systems or ducts in flat roofs. HVAC techs can detect leaks on pressurized tests and seal them with commercial-grade mastic, tape, or even more sophisticated methods like Aeroseal.
Aeroseal is a technique that uses an aerosol. Sealing Solutions locate and seal leaks from within the duct, even in areas no hand can access.
They always test before and after sealing to gauge improvements. This guarantees that all leaks are located and repaired. While the majority of businesses back their work with warranties, it can add peace of mind for homeowners.
The Repair Dilemma
When to repair or replace ductwork isn’t always an easy decision. There’s a lot to consider, such as the kind of leaks, how old the ducts are, and how it affects air quality inside. Both options have costs and benefits, not just for energy savings but for health, comfort, and future reliability.
When to Repair
- Small gaps or cracks in accessible locations
- Loose or disconnected joints
- Minor rust or corrosion
- Light insulation damage
- Isolated blockages or debris
- Whistling or rattling noises without major air loss
A small leak or loose joint is often easy to repair. Sealing these little spots can reduce heat loss by as much as 20%, which means savings every month. Straightforward repairs usually more than pay for themselves in short order, assuming the majority of the ductwork is in good condition.
Repair costs can be far less than replacement. When leaks are small and the rest of the system is performing well, repairs can bring comfort back, even out room temperatures and cut down on dust or mustiness. The enhanced system performance is particularly obvious in residences that have just a handful of trouble spots.
Checking with an HVAC pro is clever. They employ customized equipment to test for leaks, detect air flow, and identify concealed problems. Their tips save you unnecessary expenses and nail down the right repair for your ductwork.
When to Replace
- Ducts are over 20 years old
- Large sections are crushed or collapsed
- Widespread rust, mold, or water damage
- Persistent musty odors or visible mold
- Many repairs needed over a short period
- Major airflow problems or constant temperature swings
Older duct systems can wear out, with blockages or weak spots that repairs can’t fix. If the price to patch multiple leaks stacks up, replacement is a smarter long-term play. Repairs accumulate quickly. New ducts provide years of stress-free operation and reduced health concerns.
Today’s duct designs employ superior materials and smarter plans. They assist in circulating air, reduce noise, and maintain consistent room temperatures. New ducts seal better, preventing dust, allergens, and pollutants from blowing in. This upgrade can help mitigate health concerns and increase indoor air quality.
It’s never a bad idea to invest some money and effort into new ductwork. It is pricier initially, but it frequently saves money in reduced energy expenses, less maintenance, and a cozier environment. In humid climates, supplementing with an Energy Recovery Ventilator (ERV) aids in moisture control.
In dry climates, an HRV is preferable. The decision comes down to your local climate, your home’s construction, and how much moisture is an issue.
The Unseen Saboteur
Leaky ducts may be invisible, but their influence spans comfort, financial, and air quality dimensions. When ductwork leaks up to thirty percent of conditioned air in attics or crawl spaces, rooms just don’t seem to get as warm or cool as we want. High utility bills and patchy temperatures can often be tracked down to these invisible rips.
Left unchecked, this unseen saboteur continues to drain resources year after year.
The Dust Problem
Dust accumulates inside ducts as well, and when clogged, they can cut airflow by as much as 40%. This buildup not only makes heating and cooling units operate with more effort, but shoots dust into every room, decreasing indoor air quality.
This makes for dustier living spaces, which can exacerbate allergies and generally make cleaning more of a chore. Leaky ducts exacerbate this cycle, as cracks suck in dust from attics or crawl spaces and inject it into the airflow.
Periodic duct cleaning keeps dust at bay. For most, an annual cleaning by a certified technician clears out hard residue and helps identify potential leaks early on. Homeowners can pitch in by changing filters frequently and sealing accessible cracks with approved sealants.
The more cracked duct systems it has, the more dust it collects and disperses. Sealing leaks and good filters cut down on dust circulation. Easy stuff, like shutting attic access and using entryway mats, reduces the dust brought into the system.
The Pest Pathway
Things like rodents, insects, and even birds can sneak into ductwork through gaps or holes. Once there, they can gnaw or claw at duct insulation, transforming minuscule leaks into substantial ones. Torn ducts don’t only waste energy; they become conduits for droppings, fur, or even nest debris to pull into the air stream.
A periodic check-up schedule aids in identifying indicators of infestation ahead of time, such as scratching sounds or strange odors. Timely fixes seal their portals and halt the destruction.
Basic measures, like putting screens on vents and sealing joints, can complicate access to a lot. Pest leaks are an unseen energy thief. Even minor cracks and leaks allow your conditioned air to escape while letting outside elements in. Staying on top of maintenance is a great way to keep both leaks and pests at bay.
The Noise Nuisance
Noisy ducts can be an indication of leaky or poorly designed duct systems. Whistling, rattling, or banging sounds when heating or cooling cycles run could indicate air is leaking out through seams. It doesn’t just waste energy; it can indicate larger issues with system equilibrium.
Duct shape and placement influence noise transmission throughout a home. Sharp bends, loose panels, or thin materials intensify noise. Leaky ducts make air movement less controlled, creating strange noises that upset comfort.
Some insulation around ducts and sealing leaks goes a long way toward muffling those noises. Soundproofing materials and appropriate support brackets can further reduce vibration and noise. If nothing is up, a pro can test for hidden leaks or design faults.
Conclusion
Duct leaks cost energy and money. They drag indoor air quality down and hike bills. Small crevices allow air to escape. A lot of people miss these indicators until comfort plummets or costs soar. A little check and quick fix do plenty to keep air clean and costs low. While tape or mastic sometimes does the trick, other jobs require pro assistance. No free passes for anyone; old or new homes both see these leaks. To avert duct leaks, inspect ducts occasionally. Catch leaks in the act, seal them up and breathe easy. Interested in additional advice or tips for your own house? See updates or contact us for more tips.
Frequently Asked Questions
What causes duct leaks in homes and buildings?
Duct leaks are typically the result of sloppy installation, old materials, or accidental damage. Joints and seals loosen over time and produce gaps through which air escapes.
How can duct leaks affect energy bills?
Duct leaks allow conditioned air to escape, making heating or cooling systems work harder. This adds to energy consumption and spikes your monthly bill.
What are the health risks of leaking ducts?
Leaking ducts can suck dust, mold, or pollutants into your air. This can aggravate allergies or respiratory issues for residents.
How can I detect if my ducts are leaking?
Search for inconsistent room temperatures, elevated energy invoices or feeble airflow. A professional test such as a duct blower test is the most precise.
What are the best methods to seal duct leaks?
You can seal duct leaks with mastic sealant, metal tape, or professional duct sealing products. Not regular duct tape — that stuff doesn’t stick around.
Should I repair leaking ducts myself or hire a professional?
Easy leaks can be sealed by homeowners with the right materials. For major leaks or hard-to-access locations, a qualified professional saves you time and provides results that last.
How often should ductwork be inspected for leaks?
Duct leaks Your ductwork should be checked every 3 to 5 years, or earlier if you see signs like elevated energy bills or uneven temperatures.